
Understanding Shopify Theme Customization: A Beginner's Guide to Folder Structure
When I first started working on Shopify theme customization, one of the most challenging aspects was understanding the folder structure. It took me a while, countless books, and numerous tutorials to finally grasp how everything fits together. Many tutorials dive right into customizing a pre-built theme like Dawn, which is a good approach, but for a newbie, it can be overwhelming.I had so many questions, like:
- How are these pages built?
- Where can I find the About page?
- How are collections created?
- How is the cart linked with the product?
If you're feeling the same confusion, this blog is for you. I'll walk you through the basics of Shopify's folder structure, using an analogy that makes it easier to understand.
The House-Building Analogy
Think of building a Shopify theme like constructing a house. Here's how each part of the theme structure corresponds to building a home:
1. The Foundation: Layout Folder
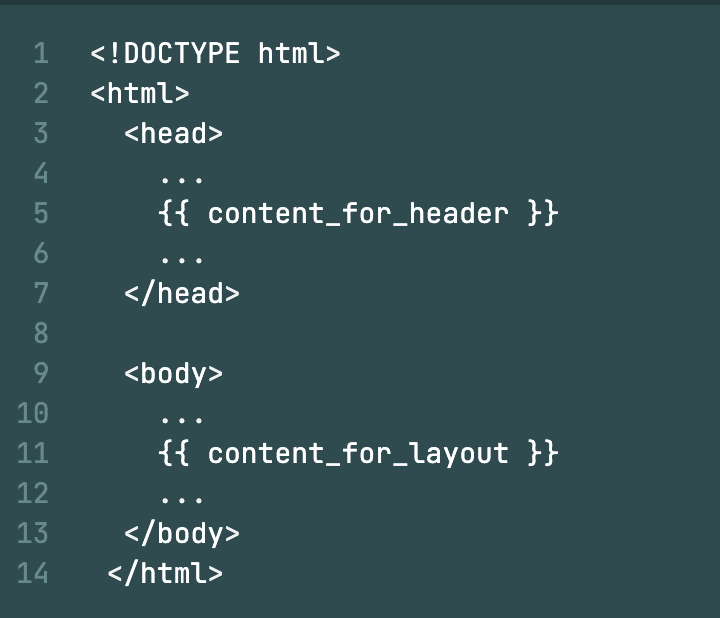
Just like the foundation of a house—its roof, walls, and floor—holds everything together, in Shopify, this is done by the layout folder. The key file here is theme.liquid, which acts as the main foundation that holds all the content together on every page.
2. The Blueprint: Templates Folder
After laying the foundation, you plan the specific layout and design of each room in your house—bedrooms, kitchen, etc. In Shopify, this corresponds to the templates folder. This folder contains blueprints for different pages on your site. Shopify uses a fixed naming convention here; for instance, the homepage design is specified in index.liquid, the product page in product.liquid, and the collection page in collection.liquid.
3. Furnishing and Decoration: Sections Folder
Once the structure is in place, you furnish and decorate your home by adding beds, sofas, tables, etc. Similarly, in Shopify, this step corresponds to the sections folder. Let's take the index.liquid file from the templates folder as an example. The index.liquid file is like a blueprint for your homepage, specifying elements like the hero image, image carousel, cards, accordion, and so on. These are your sections in Shopify, and they live in the sections folder.
4. Paint and Wiring: Assets Folder
After furnishing, you paint the walls and do the wiring. In Shopify, the assets folder serves this purpose. This is where you add your CSS and JavaScript files, which control the styling and functionality of your theme.
5. Reusable Tools: Snippets Folder
In a home, you often use small, reusable tools like a screwdriver or a wrench. In Shopify, these reusable pieces of code go into the snippets folder. Here, you might include components like a mini-cart, sidebar, product form, etc., which can be reused across multiple pages.
6. Home Settings: Config Folder
To help solidify your understanding, let's create a static hero section for your homepage. By focusing on just the homepage, we can explore how these folders and files come together in a real-world scenario. Following Shopify's documentation is incredibly helpful, so I recommend referring to it as we go through this process.
Bringing It All Together: Creating a Static Hero Section
The first step is to create a folder—let's name this devmohit—and under this, we create a folder named theme, where we add all our files that we just discussed. The first file that we are adding is theme.liquid. This is the Shopify theme architecture documentation here. We follow this; it's really amazing. When we go to architecture, we see the complete folder structure. The first is layout. Go to the overview, and we see the theme.liquid content. So, we copy this content and create theme.liquid under the layout folder and paste this content.
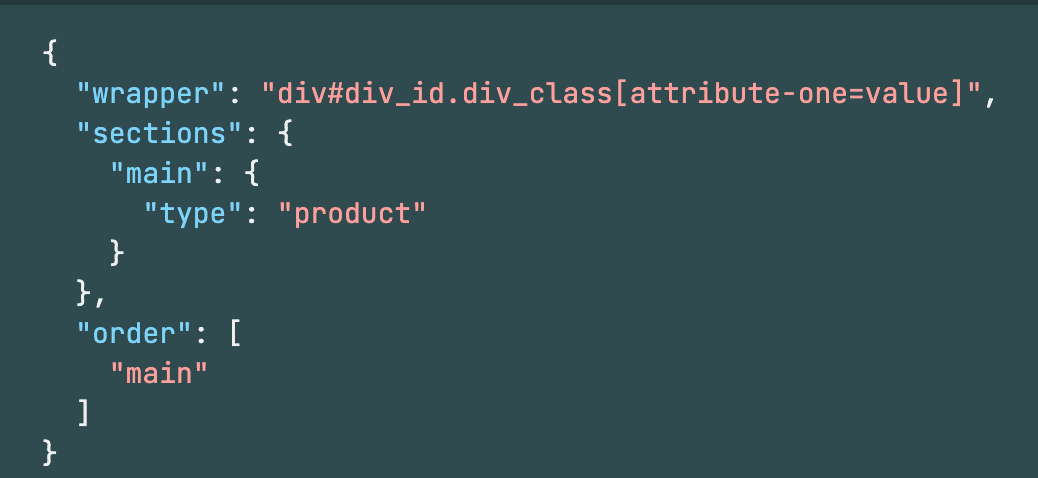
The second step is creating the templates folder, where we set how the layout should be planned. So here, we are creating the hero section that comes under the home page. We add an index.liquid file. To see what should be the content under this, go to the JSON template section and copy this content and paste it into the index.liquid file. Now, instead of product, we are writing hero. Let me explain what exactly this syntax means. Here, type: hero indicates that we are adding a hero section, which is the name of the section, and main in the order is the section ID, which here is main. We will add more sections in this in our upcoming blogs where we build the complete homepage.
Now, the next part is the creation of the sections folder, where we create the hero.liquid file where we write our hero section code
I understand that all this explanation about Shopify theme customization might be confusing until you see it in action. To help clarify everything, I've attached a video that walks you through the process step by step. If you still have any doubts or need further assistance, feel free to reach out to me anytime on my social handles. I'm here to help!
In summary, understanding Shopify's folder structure is crucial for effective theme customization. With this house-building analogy, I hope the process feels less daunting. By mastering this structure, you'll be better equipped to create customized, functional, and visually appealing Shopify stores.
In the next blog, I will integrate this folder structure with the Shopify admin after adding additional folders like assets, snippets, and config. We'll also be incorporating Tailwind CSS into the setup.